Step-by-step instructions on how to disassemble an Indesit washing machine with your own hands
 To disassemble an Indesit washing machine, you will need not only knowledge of how the equipment works, but also a certain set of tools.
If you prepare correctly and carry out all the manipulations, you can significantly save on repairs, because many parts that fail are easy to replace yourself.
Let's take a closer look at how to disassemble an Indesit washing machine with vertical and horizontal loading yourself.
Content
Preparing for disassembly
Before starting the procedure, you need to find a place where the work will be carried out. Most often, washing machines are located in the bathroom, the dimensions of which do not allow for high-quality disassembly of the equipment. The area should be well lit, and the master himself needs a place for the dismantled parts. Therefore, it is better to take the machine out into the open.
Tools that will be needed to complete the work:
- Screwdrivers of different lengths and shapes. It is convenient to unscrew the bolts with a Phillips screwdriver, and with a flat screwdriver it is convenient to pry up the clamps and move the clamps.
- Hammer. It is necessary when bearings need to be replaced.
- Pliers.
- Keys of different sizes.
- Wooden block.
Indesit washing machine circuit diagrams
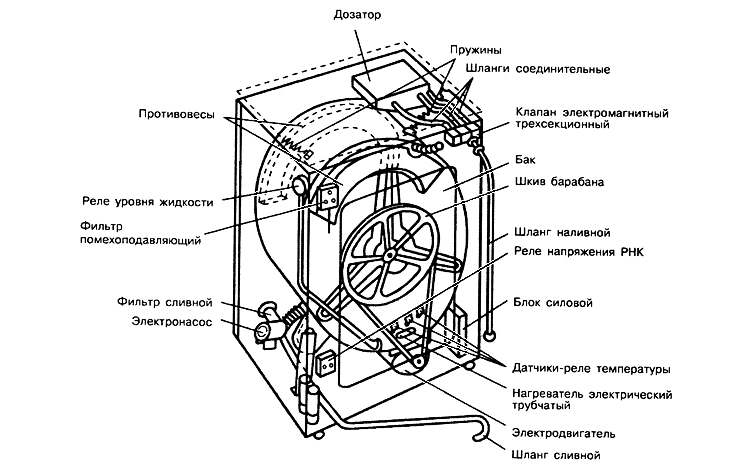
Household appliance repair specialists claim that the circuit diagrams of Indesit washing machines are in many ways similar to the circuit diagrams of Ariston appliances. Some parts are even interchangeable. At the same time, there are certain differences between the models. Therefore, for each of them the manufacturer develops its own circuit.
It’s good if you have a drawing at hand the machine you are going to work with. Also, a circuit diagram of the device’s electronics will not be superfluous. It is especially necessary when the control module needs to be repaired.

Disassembling a household appliance
Features of disassembling an Indesit washing machine will depend on what type of loading it has: vertical or horizontal. The most common models are the latter. Although top-loading devices are also commercially available.
Horizontal loading
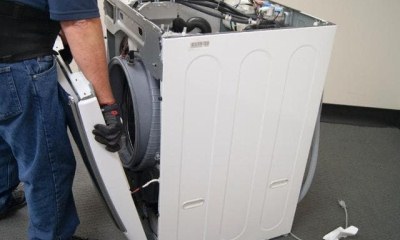
It is impossible in one article to describe the analysis of each individual model of the Indesit washing machine, since there are several dozen of them. However, a universal algorithm of actions has been developed. With minor deviations, it is applicable to all types of Indesit brand washing machines.
The procedure is as follows:
- make sure there is a container for liquid;
- attach the intake hose to the rear panel;
- open the small door at the bottom of the device, most often it is located under the hatch;
- unscrew the plug by rotating it counterclockwise;
- drain the water through the hose;
- remove the basin with liquid;
- remove the compartment for detergents from the body - to do this, press the central lock, and then remove the part.
When the priority actions are completed, the main work begins. It begins by removing the top cover, which is secured with two self-tapping screws. They are located in the upper corners of the device, at the back. They are unscrewed with a Phillips screwdriver.
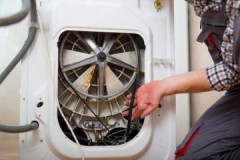
The next step is to twist the service hatch cover. It is located on the rear wall and is secured with 6 bolts. When the cover is removed, you can see the parts behind it. First of all, it is a belt draped over a pulley. It needs to be thrown off.
 Then they move on to disassembling the front panel, which is attached to 2 self-tapping screws. To unscrew them, use a shaped screwdriver. One screw is located above the tray opening.
When all the screws are twisted, start disconnecting the wires leading to the board. This is one of the easier tasks, since you just need to remove the connector from the socket to which it is connected. At this stage it is especially important to take a photo.
To get directly to the control module, you will have to twist the engine. It is accessed through the rear hatch, which has already been removed. Then carefully remove the wires leading to the heating element and temperature sensor. Now remove the control panel, it is also secured with bolts.
A slightly more difficult task is removing the heating element, which is located behind the engine, under the tank. It is pressed with a nut, and the hole itself is sealed with a cuff, which helps protect the heating element from water ingress. It is necessary to remove the heating element only if there is a suspicion that it is faulty. In other cases, it can be left in place. You need to pull out the heating element using rocking movements.
Further actions:
- Analysis of the drainage system. First, remove the cover under which the drain filter is located (it is already without water, since it was drained in advance). Unscrew the bolts that secure it to the body and push the part inside. You can then remove the pipe that holds the drain pump and filter together. To do this, use pliers. During the procedure, water may flow again, for which you need to prepare in advance.
- Removing shock absorbers. The first shock absorber is mounted above the upper wall of the tank with 3 bolts. They are twisted, after which the counterweight is carefully removed. Two more shock absorbers can be found below and above the front panel. They are carefully dismantled.
- Removing the cuff and clamp. It is pryed up with a screwdriver and driven around the circumference until it touches the fastener, which is twisted. Then the clamp is removed and the cuff is tucked into the body.
- Removing the tank. It is non-removable in Indesit brand cars and is attached with springs. If you need to get to the drum, you will have to cut it with a hacksaw.
- Removing the water inlet valve and pressure switch. The water inlet valve is accessed from the back of the device. Before removing the pressure switch, you need to disconnect the wires. Then all that remains is to remove it from the plastic niche.
Now you can begin the actions for which the machine was disassembled. Indesit will tell you how to remove the lid from the washing machine this publication.
The video will show you how to disassemble the Indesit washing machine:
From vertical
Owners of top-loading appliances may also face the need to disassemble them. In general, the algorithm will not differ from what is given above, since the set of parts in the technique is the same:
- sensors;
- engine;
- tank;
- belt;
- shock absorbers, etc.
Basic steps:
- Removing the control panel. Move it towards you, and then carefully disconnect the contacts.
- Then twist the top cover and side panels.
- Disconnect the clamp from the drum.
- Then the parts inside are sequentially disconnected.
How to assemble?
Assembling the Indesit washing machine is easy. It is enough to perform all the steps in reverse order, relying on notes or photographs.
Basic steps:
 if the tank has been disassembled, it is reassembled, after which it is installed in the housing and the pipes are connected;
- return the motor to its place, fix the removed wires;
- insert the heating element into the grooves;
- install the upper counterweight;
- return the wiring to its place;
- connect the control panel;
- put on a belt;
- straighten the cuff, install the clamp;
- screw in the filter, close the false panel;
- install a powder tray;
- all sensors record.
All that remains is to assemble the body, after which the equipment will be ready for further use.
What difficulties may arise and how to overcome them?
Difficulties you may encounter in the process of disassembling the Indesit washing machine:
- To ensure that when installing the parts there are no difficulties with reinstallation, you need to unscrew them carefully, without applying significant force. This will avoid deformation of the case and components, thread breakage and more. A hammer and other impact tools should only be used if absolutely necessary.
- To prevent a large puddle of water from forming on the floor, it must be drained in advance. Another danger of the presence of liquid inside the device is its contact with parts.Contact of spare parts and water can lead to their damage.
- The loss of bolts is associated with the difficulty of selecting fasteners of similar size. Therefore, when disassembling, they need to be placed in a separate box.
A lot of important and useful information about the repair of Indesit washing machines is presented in this section.
Conclusion
Having at hand detailed instructions for disassembling the Indesit washing machine, it is not difficult to cope with this task. However, you need to start it only if you have at least minimal experience in such work. In other cases, it is better to entrust the repair of household appliances to professionals.


