Instructions on how to remove the drum from an Indesit washing machine
 As a result of operating errors, natural wear and tear of parts or manufacturing defects, the drum in the Indesit washing machine fails.
Rotting of the walls and destruction of the bushing seat are the reasons for urgent replacement of the drum.
It is possible to repair a washing machine without the participation of unauthorized persons, with your own hands. The main thing is to carefully study all the intricacies of the process in advance and prepare the necessary tools.
We will tell you in the article how to remove the drum from the Indesit washing machine.
Content
What tools will you need?
To ensure that the work of dismantling the drum from the Indesit washing machine goes quickly, it is worth preparing a full set of necessary tools in advance.
The master's work case includes:
 hacksaw for metal;
- pliers;
- open-end wrenches;
- slotted and Phillips screwdrivers;
- socket wrenches;
- marker;
- hammer;
- pincers, awl;
- silicone sealant.
WD-40 lubricant will make it easier to unscrew soured elements.
How to prepare an Indesit machine for disassembly?
One of the stages of the drum dismantling process is preparing the Indesit washing machine.
What should be done:
- Disconnect the washing machine from the power supply, water supply and sewerage.
- Unscrew the drain filter and drain the remaining water (remove the panel located under the loading hatch, place a water container, unscrew the filter plug).
- Remove the tray for detergents (you need to press the special tab - the latch located inside the powder receptacle).
- Move the washing machine away from the wall and place the appliance on a stable, level surface.
How to get to the drum?
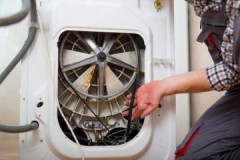
To get to the drum of the Indesit washing machine it is necessary to carry out a number of sequential actions:
 Remove the top housing cover. To do this, unscrew the fixing bolts located on the rear wall of the washing machine body. The cover is slightly moved back, lifted up and removed from the body.
- Unscrew all the bolts securing the panel on the back wall of the washing machine. Carefully turning the pulley, remove the drive belt (the parts are located behind the back panel of the washing machine).
- Disconnect the wiring cables that are attached directly to the drum. The work is carried out extremely carefully, since the cables are often clamped with plastic clamps, which are very easy to damage.
- Remove the heating element. The heating elements are located under the tank. First of all, disconnect the wiring, then loosen the central nut, push the bolt inward, pry up the heating element with a screwdriver and remove it from the socket. When reassembling, the rubber seal on the heating element must be replaced. Otherwise, there is a high risk of leakage.
- Remove the engine. To do this, disconnect the wiring step by step, unscrew the mounting bolts, gently rock the motor, and remove it from the housing.
- Remove the counterweight (located in the upper part of the washing machine body). For this work, a hexagon is used to unscrew the fixing bolts. During dismantling, the counterweight must be supported by hand. An insufficiently secured, heavy part may break off and damage other elements of the washing machine.
- Disconnect the wires and hoses from the water level sensor (the element is located on the side panel and looks like a tablet).
- Loosen the clamp holding the cuff, pull it back and push it inside.
- Remove the powder receptacle from the housing.
- Carefully lay the washing machine on its side and remove the AquaStop sensor. To do this, unscrew the drain filter fasteners, disconnect the pump wires, unclench the clamps and remove the drain hose pipe. The pump is removed along with the cochlea. At the same time, unscrew the shock absorber bolts.
- Remove the UBL (hatch locking system). To do this, having installed the washing machine in its original position, unscrew the two UBL bolts and disconnect the wiring. Additionally, the control module is dismantled. To do this, unscrew the fastening bolts and press the locking latch. The control module is not removed from the wires, but is carefully placed on the outside of the housing.
The video will show you how to disassemble the Indesit machine:
How to get the part?
In order to remove the tank from the washing machine body, you will need the help of a friend. Picking up the element from both sides, the tank is removed from the springs and pulled out through the top of the housing.
After the tank is removed, the most crucial moment comes - dismantling the drum. If the tank is collapsible, then everything is simple:
- unscrew the fixing elements, open the tank into two parts;
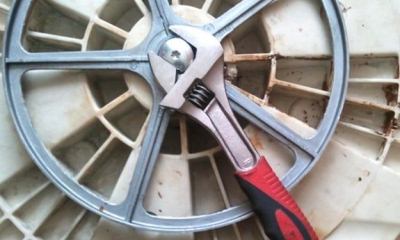
- unscrew the nut holding the pulley (it is convenient to use a hex key of the star type);
- remove the pulley from the shaft;
- We screw a bolt of suitable diameter into the thread, leaning a wooden block against it, and give several strong blows with a hammer until the drum with the shaft comes out of the tank.
Replacing an element
Once the drum is removed, you can begin installing the new part.
Algorithm of actions:
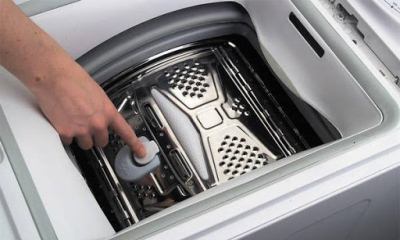 Using a metal rod, gently tapping, we knock out the bearings from the outside and inside of the tank.
- We clean the shaft and seat from debris and dirt.
- Lubricate the seat and insert new bearings. To do this, they are carefully tapped along the outer edge through an insulating washer made of getinax (preserves parts from damage). We drive the bearing all the way (until the characteristic dull sound of the bearing hitting the side of the tank).
- Just like on the outside, we install bearings on the inside of the tank. Additionally, a new oil seal (pre-lubricated with silicone) is inserted on the inside above the bearing.
- We insert the new drum into the tank. The rod should fit into the bearing.
- We put the pulley ring on and secure it with a screw.
After installing the new drum, the two halves of the tank are connected (the edges are pre-lubricated with sealant) and tightened with fixing bolts and nuts.
Reassembly and inspection
The reverse assembly process follows the following algorithm:
- we mount the tank in its original place (suspended on springs);
- install shock absorbers (for this work it is convenient to place the machine on its side);
- connect the drain hose;
- we connect the wiring to the heating element and the engine (it is convenient to carry out the work when the machine is positioned vertically);
- install the drum cuff and secure it with a clamp;
- connect the water intake, control panel;
- install a counterweight;
- fix the lid of the washing machine;
- We connect the washing machine to the sewer.
Possible difficulties when removing the tank and ways to eliminate them
A welded, non-separable tank is a problem that can only be discovered after the washing machine has been disassembled piece by piece. Cutting the tank along the soldering line with a hacksaw will help eliminate the difficulties.
Algorithm of actions:
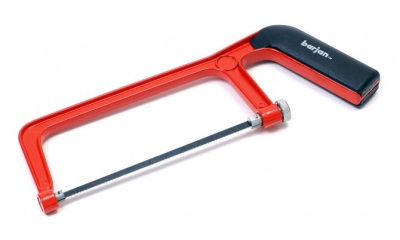 Carefully inspect the plastic tank and mark a cutting line along the factory weld seam.
- Holes are drilled along the marked line (steps of 4-5 cm).
- Use a hacksaw to cut the tank.
- Remove the wheel securing the drum with the plastic body.
- Remove the drum.
After installing the new drum, the plastic body of the non-separable tank is connected (the edges are pre-coated with sealant) and fixed with bolts and nuts (the connection points are drilled in advance).
In progress The hacksaw must be held as level as possible. The slightest misalignment in any direction increases the risk of leaks of the assembled tank in the future.
Conclusion
The work of a technician to dismantle and replace the drum in an Indesit washing machine is expensive. Anyone who, having studied all the intricacies of the process in advance, showing a little patience and accuracy, will be able to save a considerable amount of money and carry out such work with their own hands.
