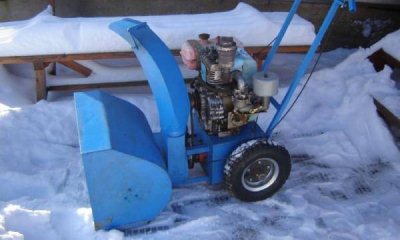
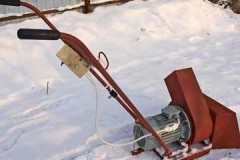
Practical recommendations on how to make a snow blower from a chainsaw with your own hands
 Snow removal requires considerable effort, which owners of private territories have to put in. You can make your work easier with the help of snow removal equipment.
However, such cars are not cheap, so not everyone can afford them. If you don't have enough money, but you have a chainsaw, it can be used as the basis for making a snow blower.
Read about how to make a snow blower from a chainsaw with your own hands, and what you will need for this.
Content
What will you need?
For assembling a snow blower The following materials and tools are required:
- engine removed from a chainsaw,
- metal pipes,
- forged shaft,
- bearings,
- sheet metal,
- rubber,
- welding machine,
- screwdrivers,
- pliers,
- metal scissors,
- hammer,
- nuts, bolts and other consumables.
It is better to remove the motor from a Ural, Druzhba or Stihl chainsaw.
Preparation
 Before you begin assembling the equipment, The following preparations must be made:
- Clear space for upcoming work.
- Remove the engine from the chainsaw.
- Prepare drawings. If there is relevant knowledge, they compile it independently. In other cases, you can use ready-made diagrams from the Internet.
Instructions for assembling a snow blower
Build process A snow blower based on a chainsaw engine looks like this:
- First you need to assemble the frame and install the motor. The frame is made from metal pipes.It is better to use steel, since aluminum is more susceptible to mechanical stress. For the base of the frame, pipes of the same diameter are used. When welding, do not leave gaps into which snow will get clogged.
- Two vertical ones are welded to horizontally located pipes. It is on them that the chainsaw motor will be installed. The first horizontal pipe is welded to the extreme rear part of the longitudinal pipes, and the next one at a distance of 20 cm. The final structure should be shaped like the letter “P”.
- The motor is installed in the formed frame. It is fixed with large bolts or welded. It all depends on whether the engine is planned to be removed in the future. To avoid vibrations during operation of the equipment, a rubber gasket is installed between the motor and the frame.
- The factory sprocket included in the chainsaw chain is replaced with a small sprocket. It can be removed from any motorcycle or bicycle.
- To make the auger, a pipe 80 cm long is used. If it is smaller, then it will not be possible to install a reliable drive. The auger blades are cut from sheet metal. They should first be shaped like a circle. Their width is 300 mm and thickness 2 mm. Holes with a diameter of 22 cm are made in the circles and they are cut. In the future they will be used to make screws. All 4 circles must undergo a similar transformation.
- 2 metal plates are welded in the center of the shaft. They should be parallel to each other.
- Then the previously made screws are welded to the shaft. They need to be placed on a shaft segment 70 cm long. The free part of the shaft will be used for mounting the drive.
- The ladle is assembled from metal sheets, which are rounded with a cylinder. The sides of the auger should be 7 cm larger than its base.
- An incision is made in the upper part of the sheet into which a pipe will be inserted to eject snow. It is installed at the desired angle, on which the snow throw range depends, and welded. The recommended pipe diameter is 15 cm.
- Bearings are placed on the shaft.
- Make several holes in the auger and install a pipe in them, fixing them with bolts.
- A bucket is placed over the pipe.
- The sprocket is installed on a section of the shaft free of screws.
- A bucket and auger are welded to the horizontal parts of the frame.
- Put a chain on the drive and achieve the desired tension.
- Mount the handle. The control levers and the on and off button are located on it.
How to use?
Terms of use homemade snow blower:
 Before starting work, you need to check the reliability of all fasteners.
- To start the engine, close the air damper and pump fuel into the carburetor using a primer.
Perform several movements with the starter, open the damper and pull the starter cord again.
To normalize the speed, press the control lever all the way and immediately release it.
- When clearing snow, you need to remember that the chainsaw motor may not withstand high loads. Therefore, it is necessary to move slowly, partially covering the already cleared strip.
- The area should be cleared in advance of stones and branches that could damage the device.
- After each cleaning, the car is cleared of snow and dirt.
- Store the snow blower in a warm, dry room.
Helpful information
Tips for assembly and operation snow blower:
- a snowplow assembled by yourself must have a strong and stable frame - the reliability of the entire structure and the quality of snow removal depend on this;
- the blades of the knives on the shaft must be installed at the same distance - if this recommendation is violated, the snow blower will tilt to the side during operation due to imbalance;
- all rotating parts are regularly lubricated;
- the chute should be installed in such a way that the thrown snow does not fall on the operator or on the machine elements;
- the augers can be equipped with teeth, which are cut with a grinder - they make it easier to remove packed snow, but can damage the coating.
Video on the topic of the article
The video shows a snow blower powered by a Ural chainsaw motor:
Conclusion
A snow blower based on a chainsaw motor is not inferior in performance to its factory counterparts. You can modify the equipment at your own discretion, which is its advantage. However, assembling the machine will require time, tools and strict adherence to the instructions.


