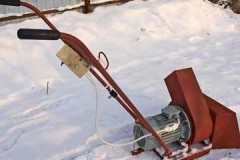
Useful tips for repairing snow blowers
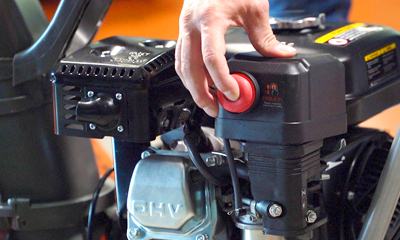 A snow blower, like any other equipment, cannot work without breakdowns. They always happen, regardless of the cost and brand of the model.
Some of them you can handle on your own, others are best left to specialists.
Read the article about what malfunctions occur most often and how to repair a snow blower yourself.
Content
The most common breakdowns and how to fix them
A common cause of snow blower breakdowns is improper operation. You can avoid problems if you read the user manual before starting work. and follow the recommendations contained therein.
The car won't start
There are several reasons that prevent the engine from starting. These include:
-
 Lack of fuel or expired fuel. Gasoline should not be left in the tank for more than a month.
After this, additives begin to disintegrate, oxidative processes start, and a precipitate forms.
This damages the walls of the tank and provokes corrosion. If the fuel has been in the gas tank for more than 3 months, the vehicle will not be able to start. Gasoline needs to be changed regularly.
- The oil sensor blocks the operation of the machine (not installed on all snow blowers). This happens when the engine is low on oil. It must be measured before each use of the equipment. A breakdown of the oil sensor requires its replacement or complete shutdown.
- Discharged battery. This problem is relevant for battery technology. The lower the ambient temperature, the faster the battery loses charge. If a breakdown is detected, you can try to start the machine using a manual starter.
- Fuel system clogged. It needs to be cleaned of combustion products, ice and other contaminants.
- The spark plug is loose. They unscrew it from the cylinder, inspect the electrodes, and clean them.
- Incorrect throttle position. If the machine is started with a cold engine, it must be closed. Open it as the engine warms up.
- The fuel tap is turned off. Its blockage prevents the supply of gasoline.
- The carburetor sump is clogged, which often happens when the equipment is idle for a long time. Cleaning should be entrusted to the service center technicians. You can avoid clogging by adding a stabilizer to the gas tank. This is done during engine preservation before the summer period.
You can check the sump tank for blockages by spraying a small amount of gasoline into the combustion chamber. If the engine starts and stalls, then you cannot do without cleaning the carburetor.
Spark plug fault
To check the functionality of the spark plug, perform the following actions:
- put the candle on the cap;
- touch the cylinder body of the internal combustion engine with a metal nut;
- pull the recoil starter cord;
- if a spark appears, the spark plug is in good condition; if it is weak or absent altogether, the spare part must be replaced.
A burnt-out spark plug will prevent the engine from starting. When carbon deposits form on it, or its seat becomes clogged, the engine runs, but is unstable and picks up speed poorly. If the carbon deposits are black and oily, then you should pay attention to the condition of the motor itself.
Shear bolts broke
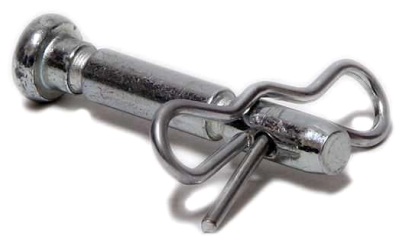 The keys in snow blowers are made of soft metal. Their thickness rarely exceeds 6 mm, so when they get hit by pieces of ice, stones or when clearing snow on the earthen surface, they often break.
Replacing them is easy. Simply remove the broken bolt and screw a new one in its place..
It is better to use original parts that are exactly matched to the snow blower model.
Some equipment owners screw in regular bolts, since when they hit an obstacle they are not cut off, the auger works longer, but such resistance is dangerous for motor failure.
Belt wear
Causes of premature wear of drive belts:
- Long cycle of work without stopping. At the same time, the materials become very hot, causing them to stretch and tear faster.
- Work in short sessions. Repeated turning on and off of the motor leads to wear not only of the belts, but also of the motor itself.
- Failure to comply with storage rules. If the machine is left idle in direct sunlight or in a room with high humidity levels, the belts will deteriorate faster.
- Incorrect assembly of equipment or excessive belt tension.
If the belt is stretched, deformed or torn, it must be replaced. To do this, remove the housing cover and unscrew the screws securing the faulty part. A new belt is installed in its place, ensuring the required tension.
Damage to the friction ring
A friction ring is a transmission element that ensures the wheels rotate at a given speed. Reasons for failure:
- frequent gear changes;
- high speed of movement when trying to remove large snowdrifts;
- dampness, which leads to corrosion.
Damage to the friction wheel is indicated by a creaking sound that is heard while the equipment is moving.
To replace the friction ring, you need to perform the following steps:
- Unscrew the spark plug.
- Remove wheels and locking pins.
- Remove the upper gearbox cover and remove the pin from the clamp.
- Remove the support flange and friction ring.
- Install a new part in its place.
Then the equipment is reassembled, performing the steps in reverse order, and the operation of the replaced mechanism is tested.
Repair instructions - in the video:
Air filter clogged
The air filter on a snow blower engine most often becomes clogged not because of dust and dirt, but because it gets wet. The pores of the material become narrower, which makes it difficult for air to pass through it.
The following signs indicate reduced throughput:
- difficulty starting the engine;
- decrease in speed;
- unstable engine operation;
- loss of power;
- appearance of smoke;
- increased oil consumption.
To replace or clean the filter, you need to unscrew the wing and remove the cover under which it is hidden. Then unscrew the nut holding the filter material, remove it and change it.
Broken or sagging auger drive cable
 If the drive cable is broken or stretched, the auger will not rotate. To replace it, perform the following steps:
- Remove the cable from the handle of the machine.
- Disconnect it from the pressure roller.
- Install a new cable.
- Adjust the degree of tension.
Poor snow removal is not always associated with a broken cable. Sometimes the cause is weak fixation of the pressure roller. To restore the functionality of the equipment, it is enough to adjust the degree of pressure of the roller on the belt.
Auger gearbox
The gearbox is responsible for transmitting torque to the auger shaft. Its breakdown is indicated by a lack of rotation or jerking when trying to remove snow from the area.
To replace the auger gearbox, perform the following steps:
- Remove the auger and disassemble it.
- Unscrew the bolts securing the two parts of the gearbox.
- Remove the gear.
- They change it.
- Reassemble the car in reverse order.
To make the gear last longer, graphite lubricant is generously applied to it after installation.
Repair instructions - in the video:
Recoil starter cord broken
If handled incorrectly, the recoil starter cord may break. To replace it, you will need to do the following:
- spin the starter;
- cut off the old cord;
- insert a new cord through the holes in the drum;
- tie a knot to secure;
- pull the cord through a loop and put it on the recess in the drum;
- make several turns of the cord counterclockwise;
- pull it, holding the drum and slowly release it;
- The cord will wind on its own.
If after the last step it sags, the procedure must be repeated.
Engine
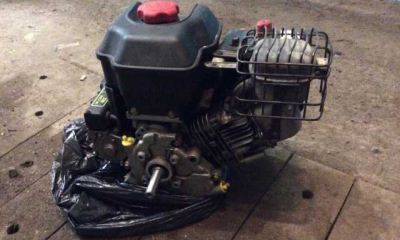 Motor failure refers to complex faults. If, after checking all the auxiliary parts (spark plugs, belts, filter, etc.), the vehicle cannot be started, then repair of the engine itself is required.
You may need to remove debris from the cylinders, replace heads or replace pistons.
It is difficult to cope with engine repairs on your own. This will require knowledge and professional equipment. Therefore, if such a malfunction is detected, you should contact the service center.
How to disassemble snow removal equipment and remove the top cover?
Complete disassembly of a snow blower is rarely required. Repair comes down to replacing the main components that are removed separately, namely:
- motor - gasoline or electric;
- ladle;
- screw;
- snow discharge chute;
- wheels (caterpillars);
- control levers;
- control panel (not available on all models).
What's better: fixing it yourself or calling a professional?
When deciding to repair a snow blower yourself, you need to take into account the complexity of the breakdown. If you can do it yourself when replacing a filter or spark plug, you won’t be able to disassemble the engine at home.
If the device is under warranty
 New equipment always comes with a warranty. Its validity period depends on the manufacturer.
For most machines it is 1 year. Although there are models that can be repaired at the expense of a service center for 2-3 years.
An important condition for obtaining warranty service is compliance with operating rules. If the breakdown occurs due to the fault of the user, then the equipment will have to be repaired at your own expense..
While the machine is under warranty, any changes in its design, including disassembly of basic elements, are unacceptable.
Pros and cons of DIY repairs
Advantages snow blower repair at home:
- Saving on parts and expert services.
- High speed of work completion.
- 100% guarantee of installation of new spare parts.
- There is no need to transport large equipment to a service center.
Flaws:
- Time costs.
- Loss of warranty service.
- Lack of ability to perform complex repairs.
- Risk of equipment failure.
- Lack of necessary tools and parts.
Advantages and disadvantages of repairs at a service center
Advantages repairs at the service center:
- the work will be performed by a professional;
- there is no need to purchase tools and waste time buying spare parts;
- saving personal time;
- possibility of paid delivery to the service;
- warranty for repairs performed and parts replaced.
Flaws:
- financial expenses;
- repair time depends on the workload of the service center;
- the risk of work being performed by an unqualified craftsman.
Price
 The cost of repairing a snow blower depends on the complexity of the breakdown and the prices set by the service center. Approximate prices:
- Replacement of spark plug – 150 rubles.
- Carburetor replacement – 1000 rubles.
- Replacement of a fuel tank – 500 rubles.
- Starter repair – 1500 rubles.
- Engine repair – from 7,000 rubles.
- Replacing belts – 900 rubles.
Comprehensive preventive repairs of a car cost about 8,000 rubles.
Conclusion
Repairs and replacement of consumable parts on a snow blower can be done on your own. Complex breakdowns require specialist help. If the equipment is under warranty, contact service centers, the addresses of which must be indicated on the coupon issued at the point of sale.
