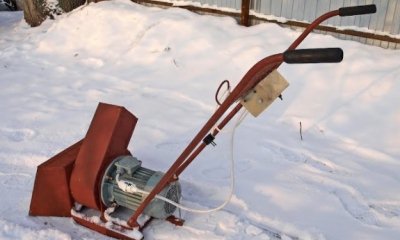
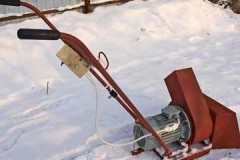
Step-by-step instructions on how to make a snow blower from a trimmer with your own hands
 Snow blowers allow you to automate the snow removal process. However, such machines are not cheap, which becomes an obstacle to their acquisition. There is a way out of the situation if the house already has a trimmer.
Some models of these grass cutting tools are designed in such a way that, with certain knowledge and tools, they can be converted into snow removal equipment.
Read the article on how to make a snow blower from a trimmer with your own hands.
Content
What will you need?
To perform work on converting a trimmer into a snow blower, You will need the following tools:
- drill with different drill bits;
- welding machine;
- Bulgarian;
- wire cutters;
- hammer;
- screwdrivers;
- spanners.
Materials without which it will not be possible to carry out the work:
- a metal sheet;
- screws, bolts and nuts;
- metal or plastic pipe;
- clamps
The design of the rod is of no small importance. If it is presented in the form of an arc, then the transmission is carried out using a cable, which is unacceptable for a snow blower. It is necessary that the torque from the motor be directly transmitted to the working unit, that is, carried out using a cardan shaft.
It’s good if the trimmer is equipped with 2 wheels, this will allow you to comfortably move it around snowy areas. Equipment with 4 wheels is not suitable for transformation. A prerequisite is that the blades are located in the lower front part of the device.
How to make?
Before starting to manufacture the mechanism, it is necessary to draw up a drawing and take the appropriate measurements. The conversion process does not involve interfering with the internal structure of the trimmer. It is enough to attach a metal nozzle to it. If you have the tools and materials, such work is not difficult.
Drum
To make the drum body you will need a metal sheet. Its height should be less than its diameter. The exact dimensions depend on the area planned to be cleared of snow.
There is no need to make a massive body. When collecting a large amount of snow at once, the load on the trimmer motor increases, which can lead to its overheating and breakdown.
Procedure:
 A circle is cut out of a metal sheet in accordance with the specified dimensions.
- Cut out the side, the length of which should correspond to the circumference of the drum body.
- Weld the side to the body.
- A hole is drilled in the center of the bottom. Through this slot the drum will be attached to the gearbox housing. It should be larger than the diameter of the shaft, this avoids their contact.
- Fasteners or nuts are welded to the gearbox housing.
- Holes are drilled in the bottom of the drum, which are intended for fasteners.
- Combine the drum with fasteners on the gearbox and securely fix it.
- To securely fasten it to the back of the drum, a stop in the form of a jumper is welded. It will connect it to the braid driveshaft tube using a clamp.
- A hole is cut out at the top of the drum, into which a chute is inserted for discarding snow and welded.It is necessary to install the pipe in such a way that snow masses do not fall on either the trimmer or the working person. The distance the snow is thrown depends on the angle of inclination.
Screw
Manufacturing procedure:
- Sheet metal is used for the screw. A circle is measured on it, which should be 20 mm smaller in diameter than the drum.
- A hole is drilled in the center, which should be half a millimeter larger than the diameter of the shaft.
- The blades are welded to the finished disk. There should be 4 of them. The blades are arranged crosswise.
- Screw the nut onto the shaft, put on the disc and secure it.
The structure must be made in such a way that during rotation it does not come into contact with the bottom of the drum.
Bucket and machine front
Manufacturing procedure:
- A metal sheet is screwed to the front of the drum. It should cover it 50%.
- To be able to remove the nozzle, “ears” with holes are welded onto the drum. It is on them that the metal plate is fixed using bolts.
- A plate in the form of a scoop is welded or screwed to the bottom of the body. It is first sharpened on one side. It will be responsible for picking up snow masses and crashing into ice.
They connect all the elements and put the equipment into operation.
Video instructions for making a snow blower from a trimmer:
How to use?
Features of operation homemade snow blower:
- Before you start clearing snow, you need to fill the engine with oil - it must be designed for operation in the cold season;
- the engine is pre-warmed - it should run for at least 5 minutes;
- You should not change gears frequently, so as not to cause engine damage;
- it is necessary to prevent stones, branches and other debris from entering the device;
- the snow blower is moved forward only;
- after cleaning is completed, the engine is not turned off - it is allowed to run for 2-3 minutes to prevent the formation of condensation and its subsequent freezing;
- after completion of cleaning, the snow blower is cleared of ice and debris;
- all metal parts are regularly lubricated and rust is removed from them;
- Store equipment in a warm, dry room.
Helpful information
Tips for use and production snow blower from trimmer:
 Since the trimmer motor is not designed for high loads, it is necessary to take breaks while clearing snow.
- All fastenings should be checked for security before each use of the machine.
- A modified snow blower is not used to clear ice and compacted snow layers.
- For ease of use of equipment in the evening, you can mount an autonomous flashlight on it.
Conclusion
You can make a snow blower from a trimmer at home. It is most convenient to carry out work in a heated garage, where there is enough space to accommodate machinery and necessary equipment.


