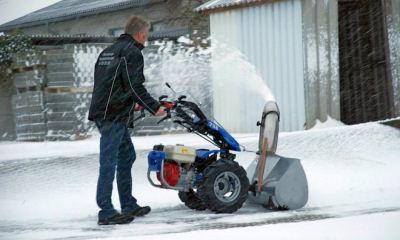
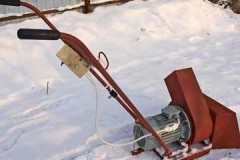
Practical recommendations on how to make a snow blower for a walk-behind tractor with your own hands
 A walk-behind tractor is a universal technique that, thanks to its mobility, is capable of performing many functions.
It is used to cultivate the soil and carry out agricultural work, but with the onset of cold weather it sits idle.
In fact, you can find use for a walk-behind tractor in winter if you transform it into a snow blower with your own hands.
Read the article about how to make a snow blower for a walk-behind tractor with your own hands, what tools and materials you will need, and how to use the equipment.
Content
What will you need?
For assembling a snow blower You will need the following tools:
- drill for drilling holes;
- manual riveter for metal;
- welding machine;
- grinding machine - it is used for cutting metal and cleaning welds;
- hand scissors for metal;
- tape measure for taking measurements;
- vice;
- jigsaw;
- pliers;
- screwdrivers;
- washers;
- bolts;
- screws.
Materials you will need for making a snow blower:
 metal sheets or base for making a box;
- pipes that will serve as the base of the shaft and as a trench;
- bearings;
- conveyor belt - an auger is cut out of it;
- chains or belts for drive;
- steel corners for fastening the frame;
- pulleys and sprockets;
- dye.
Preparation
Preparing for assembly snow blower is carried out in several stages:
- Select the type of snow removal attachment. The simplest, but less functional, is the blade shovel.An air-rotary snow blower is more difficult to manufacture and install, but its productivity is much higher.
- Prepare drawings that will serve as the basis for the work. You can develop them yourself or find them on the Internet.
- Prepare tools and materials that will be used during the assembly process.
- Clear the work area. It is most convenient to assemble a snow blower in an equipped garage.
How to do it?
The simplest design is a mounted shovel blade. With its help, snow masses are simply moved to the side. When moving forward, it is lowered down, raking up snow, and when moving back, it is raised. This option is suitable for clearing light snow cover.
A rotary auger snow blower is complex from the point of view of manufacturing technology. Manufacturing instructions:
- A box is made from a sheet of tin by cutting out its side parts and base. Bend the sheets using a cylinder. Weld the prefabricated parts of the body.
- A shaft is made from a pipe. Its thickness should not be less than 50 mm.
- Segments for the auger are cut out and blades are formed from them. Weld them to the shaft so that they converge to the outlet, which will be located in the center of the box. Perform balancing.
- Install the bearings, attach them to the side parts of the snow blower, and assemble the auger. When assembled correctly, it will feed snow onto the rotor.
- A hole is cut out in the casing and a pipe is installed in it, which will serve as a chute for throwing out snow. It is fixed with metal holders.
- The rotor housing is cut out of sheet steel; you can also use an aluminum boiler with a volume of 20 liters. it is attached to the front wall of the housing.
- If the engine has a pulley, then a belt can be used as a drive. It will transmit torque from the walk-behind tractor engine to its shaft, which is connected to the snow blower shaft.
- The working unit of the snow blower is assembled and the transmission elements are mounted.
- An asterisk is welded at the end of the shaft, with the help of which the speed will be changed.
If necessary, a flashlight is installed on the equipment. All metal elements are coated with durable paint, which will protect the equipment from corrosion.
Video instructions for making a snow blower for a walk-behind tractor:
How to use homemade equipment?
Terms of use snow blower with walk-behind tractor:
- Fill the engine with gasoline, move the choke lever to the “Start” position, open the tap and pull the starter cord several times;
- after this you can turn on the ignition;
- Before starting work, the engine must be warmed up;
- the equipment should be moved slowly, taking part of the already cleared path, so that snow does not clog the chute and the engine does not overload;
- the stream of snow coming out of the chute should be directed in the direction opposite from people, the worker himself, and nearby buildings;
- Do not clear snow from steep slopes and hills;
- After completing the cleaning, the engine is not immediately turned off; it is allowed to run for some time to evaporate the moisture.
Helpful information
Tips for production and operation snow blower:
 Before starting work, it is necessary to check each time the reliability of all fasteners, the tightness of the fuel tank, etc.
- Smoking is prohibited while refueling the engine with gasoline.
- Construction glasses can be used to protect your eyesight.
- It is recommended to lubricate the seat on the walk-behind tractor with silicone to avoid friction and rust.
- The engine of the walk-behind tractor should be filled with synthetic oil designed to operate at sub-zero temperatures.
Conclusion
A self-made snow blower based on a walk-behind tractor will cost much less than buying ready-made equipment. When assembled correctly, the performance of such a machine is not inferior to industrial snow removal units.


