Instructions for replacing the crosspiece of an LG washing machine with your own hands
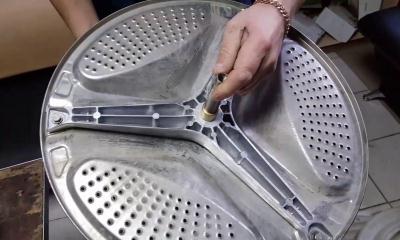 The crosspiece is one of the most important elements of the internal structure of an LG washing machine. Placed between the drum and the tank, it is this part that ensures the uninterrupted operation of the moving part of the household appliance.
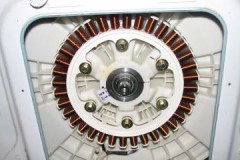
With each wash, the crosspiece withstands colossal loads, which over time render both the component parts of the part (namely the bearing assembly) and the entire structure unusable.
Timely diagnosis and replacement of the damaged crosspiece will prevent serious problems in the operation of the LG washing machine.
Content
How do you understand that you need to change the washing element?
A signal that the washing machine requires repair is there may be knocking, rustling and other extraneous soundsappearing during the washing process. Most often, they indicate that the bearing assembly, one of the main elements of the cross, has failed.
Ignoring the problem can lead to even more serious damage and even complete failure of the washing machine.
A decision to repair or replace the crosspiece can only be made after a visual inspection of the part. If the cause of the knocking noise is wear of the bearing assembly, a partial repair can be carried out (replace the bearings and oil seal).The wear of the shaft and threads, mechanical damage (cracks, dents) require a complete replacement of the cross.
Preparing for work
To make replacing the crosspiece in an LG washing machine as quick as possible It is necessary to properly prepare for repairs:
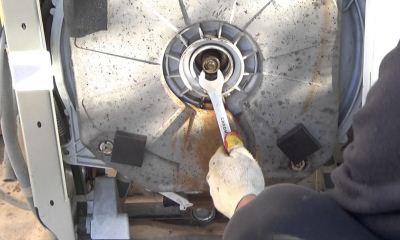 Disconnect the household appliance from the power supply, water supply and sewerage.
- Disconnect the intake hose (the corrugation is located on the rear panel of the washing machine).
- Unscrew the drain filter (it can be found at the bottom of the front panel).
- Move the washing machine away from the wall (nothing should interfere with the free movement around the body of the household appliance).
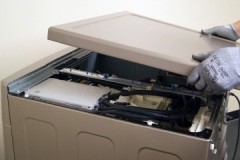
- Unscrew the screws holding the top panel (they are not difficult to find on the back wall of the case.) Slightly moving the cover towards the rear panel, remove the part from the case.
- Remove the powder receptacle. To do this, you need to open the dispenser, press the plastic “foot” located in the middle compartment, and pull the tray towards you. In the opened niche, unscrew all the screws holding the control panel.
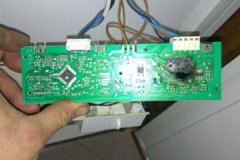
- Remove the control panel. To do this, you need to release the plastic latches securing the wiring. A very important point: the location of the wiring on the control panel must be recorded in a photo or video before disconnection. This will help avoid errors in reconnecting the panel during the reassembly of the washing machine.
- Remove the baseboard panel located at the bottom of the washing machine.
- Remove the rubber seal of the hatch. To do this quickly, you need to bend the edges of the cuff, carefully pick it up with a screwdriver and remove the clamp holding the elastic.
- Dismantle the UBL. To do this, unscrew the bolts holding the lock. After which the UBL is easily removed from the niche in the housing.After the front panel is dismantled, the pipe connecting the powder receiver to the tank is disconnected, the inlet valve and the counterweight are removed.
- Remove the back panel (just unscrew the fixing bolts), after which the following are disconnected step by step: heating element wiring, pressure switch tube, drain pipe clamp, electric motor wiring, engine, shock absorbers.
- Remove the tank. It's simple: just lift it slightly and remove it from the hooks.
- Remove the top cover of the tank (in LG washing machines it is most often collapsible). To do this, you need to lay the tank on a flat surface and unscrew the fourteen bolts securing the two halves.
- Remove the drum. To do this, holding the pulley with one hand, unscrew the central bolt. Afterwards, remove the pulley and, gently tapping the shaft, remove the drum from the tank.
After the drum is removed from the tank, you can visually assess the degree of damage to the crosspiece and make a decision on partial repair or complete replacement of the part.
How to change?
The most labor-intensive preparation process is over, you can begin replacing the cross. This process is simple, The main thing is to strictly follow a certain algorithm of actions:
-
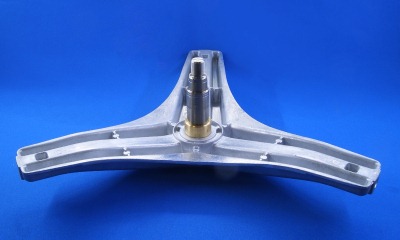 The crosspiece is fixed to the drum with three bolts. To remove the old part, the bolts must be unscrewed.
In the case where the fasteners do not lend themselves (the metal is covered with scale or rust), WD-40 liquid will help speed up the process.
It is enough to treat the soured bolt, wait twenty minutes, and then unscrew it with a screwdriver.
- Having unscrewed the fasteners, carefully tap the crosspiece with a hammer, knocking it out of the grooves of the drum (you can use a screwdriver).
- A new cross is installed in the vacant space and secured with bolts. Attention: before installation, the drum walls must be cleaned of dirt and scale.
After the new cross is fixed, the assembly of the washing machine begins (the sequence of actions is the reverse of the dismantling process).
If the test wash went through without any suspicious noises, the repair of the LG washing machine can be considered successfully completed.
This video will tell you about replacing the crosspiece in an LG washing machine:
Where to buy and how much does a new part cost?
Crosses are made of lightweight but durable materials (most often aluminum or stainless steel). Depending on the model of the washing machine, the cross may differ in shaft length, distance between bearings.
In order not to make a mistake when choosing a new part, it is very important to know exactly the model of your LG washing machine (these are letters and numbers that can be seen on the side panel or hatch). If you cannot find the necessary information on the case, you can look it up in the passport of the household appliance.
The average cost of a crosspiece for an LG washing machine is 3,000 rubles. Purchasing on the websites of official representatives of LG household appliances minimizes the risks of counterfeits. Before the purchase It wouldn’t hurt to ask the seller for quality certificates for the selected product.
Call the master
 The process of replacing the crosspiece is complicated by a long preparation stage. After all, in order to get to the required part, you need to disassemble the washing machine almost to the ground.
For those who do not understand anything about the structure of the LG washing machine, it is better to entrust the replacement of the cross to professionals.
Service center technicians will quickly carry out diagnostics and provide high quality, with a guarantee they will replace the failed element. It is not difficult to find the necessary contacts on the Internet.
On average, the work of a specialist to replace a crosspiece will cost 3,000 rubles. (excluding new part). The cost of repairs may be affected by: the urgency of completing the order, possible malfunctions of other mechanisms and components detected during the initial diagnosis of the washing machine. Before submitting a request, it would be a good idea to look for reviews about the selected service provider.
Conclusion
Replacing the crosspiece, like any other parts in a washing machine, requires certain skills and dexterity. You can dismantle the worn element with your own hands and install a new one only if you have confidence in your own abilities. Otherwise, it is better to entrust the restoration of the LG washing machine to a specialist.
