Step-by-step recommendations on how to remove the drum from an LG washing machine and replace it
 Creaking, knocking, problems with spinning indicate that one of the main elements of the internal structure of the LG washing machine - the drum - has failed.
There is no point in putting off repairing or replacing the drum (delay can lead to complete failure of the household appliance).
Having studied the theoretical part in detail, you can safely begin to practice - restoring the functionality of the washing machine drum.
We'll tell you how to remove and replace the drum of an LG washing machine below.
Content
The structure of the washing machine element
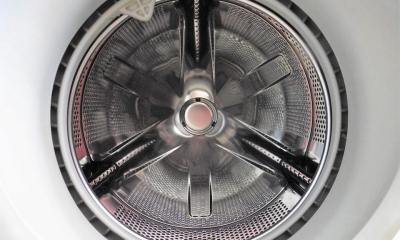 A container made of perforated stainless steel located inside the washing machine tub is called a drum. Exactly dirty laundry is put into it through the hatch.
On the reverse side, the drum is connected to the motor through a shaft. The inner walls, in addition to perforation, are equipped with special ribs (loops). They help to better mix the laundry during the washing process.
The stainless steel drum capacity is enclosed in a plastic tank body (the two elements are connected using a pulley). Most often, LG washing machines are equipped with collapsible tanks (two parts are connected with latches and bolts). Very rarely, in older models of washing machines, the tanks are solid.
Possible breakdowns and their causes
The fact that the LG washing machine drum requires repair or replacement is indicated by multiple problems.
Doesn't turn
The washing mode has started, but the drum does not spin. The cause of this situation may be a power surge. Restarting the washing machine will help resolve the problem.
If restarting the washing machine does not help, it is necessary to carry out the following manipulations step by step:
- Clean the drain filter (located at the bottom of the front panel).
- Check the condition of the heating element. In order to get to the heating element, you need to remove the back wall of the washing machine and apply the multimeter probes to the contacts of the heating element. If the resistance reading is “0”, the heating element must be replaced.
- Check the pressure switch. The water level sensor is located in the upper right corner under the lid of the washing machine. Testing the pressure switch with a multimeter will help you decide whether to replace the element.
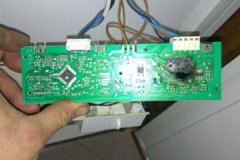
A “stuck” drum may indicate damage to the control module. At home, you can only inspect the module (located on the back of the control panel) for burnt contacts. Repairing the “brains” of a washing machine is best left to a professional.
Knocks when spinning
 Most often, the drum starts knocking in spin mode due to overload. This assumption can be verified as follows:
- drain the water, take the laundry out of the washing machine;
- restart the washing machine in spin mode.
If the knocking stops, the problem is caused by errors in the operation of the household appliance.If the empty drum continues to knock during spin mode, then most likely the cause of the unpleasant sound lies in worn bearings.
Replacing bearings is a labor-intensive process. To get to the drum it is necessary to almost completely disassemble the household appliance:
- remove the top panel, remove the dispenser;
- dismantle the control panel (the wiring is not disconnected);
- Unscrew the drain filter, remove the front panel;
- dismantle the counterweight, disconnect the wiring of the heating element and electric motor;
- Remove the tank from the shock absorber and dampers.
Further:
- Unscrew the fasteners holding the pulley.
- Carefully knock out the shaft.
- Using a thin screwdriver, remove the oil seal (it must also be replaced).
- Gently tapping the bearings knocks them out of their seats.
- The freed space is wiped from dirt and filled with lubricant.
- New bearings are driven into the prepared area and the seal is installed.
The final step is to reassemble the washer and do a test wash.
Creaking noise when rotating
Most often, the drum squeaks when rotating due to blockage (small objects, buttons and buttons get into the space between the tank and the drum).
 Fixing the problem is simple:
- the machine is disconnected from electricity, water supply and sewerage;
- remove the back panel;
- disconnect the heating element wiring (located under the tank);
- unscrew the fixing nut and remove the heating element from the seat;
- clean the opened hole from foreign objects.
Additionally, the rubber cuff of the hatch is checked and, if necessary, cleaned of debris.
There is water in the tank
The wash is finished, but there is still water in the washing machine drum. A similar situation can be provoked by:
- Kink in the drain hose.
- Blockage in the drain system.
- Drain pump failure.
- Failure of the pressure switch.
Attempts to eliminate the problem begin with cleaning the drain pump filter.
Algorithm of actions:
- the washing machine is disconnected from the water supply, sewerage and electricity networks;
- drain the remaining water from the inlet hose;
- Open a small hatch at the bottom of the front panel and unscrew the drain filter.
If cleaning the drain filter does not lead to the desired result, you need to check the drain pump and pipe.
Algorithm of actions:
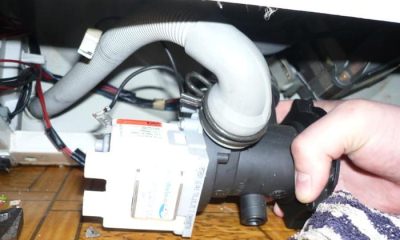 Disconnect the drain pump wiring (do not forget to first record the location of the wires in a photo or video).
- We unscrew the fasteners and loosen the pipe clamp.
- We disconnect the pipe and check it for blockages (for example, let a strong pressure of water pass through it).
- We check the winding of the drain pump with a multimeter.
Additionally, the pressure switch (water level sensor) is checked. If the pressure switch fails, the module will not receive a signal to start the pump and, as a result, water will begin to accumulate in the washing machine drum.
In order to check the sensor, remove the top cover from the washing machine, under which, in the upper right corner, there is a small plastic washer - a water level sensor. The element is checked with a multimeter (probes are applied to the sensor contacts).If necessary, the pressure switch is changed (this element cannot be repaired).
Dangles
Understand that drum play is a problem and not the norm (a small gap is provided by the manufacturer) possible based on the following criteria:
- in spin mode, the washing machine hums, vibrates and even jumps;
- the drum hits the body or glass of the hatch;
- the drum rubs against the hatch cuff.
Replacing shock absorbers is quite simple:
- The washing machine is disconnected from communications and carefully laid on its side (access to the shock absorbers is available through the bottom).
- The old elements are unscrewed. New shock absorbers are installed in their place.
Even if one shock absorber is worn out, both parts must be replaced.
Replacing a part yourself
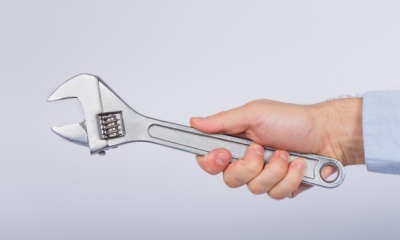 To ensure that the process of replacing the drum of an LG washing machine goes as quickly as possible, you need to prepare properly:
- assemble a set of necessary tools (screwdrivers, pliers, sealant),
- disconnect the washing machine from electricity, sewerage, water supply,
- move the device away from the wall.
Then the most labor-intensive stage begins - disassembling the washing machine (this is the only way to get to the drum).
How to disassemble and remove?
Algorithm of actions:
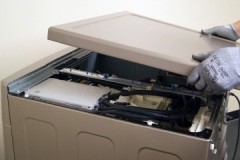
- After unscrewing the fixing bolts, remove the top panel.
- We take out the detergent dispenser.
- After unscrewing the screws, we dismantle the control panels (do not touch the contacts).
- Pull back the latches and remove the decorative strip located at the bottom of the front panel.
- Using a thin screwdriver, pull out the clamp holding the hatch cuff.
- We fill the rubber seal inside the drum.
- We unscrew the UBL fixing elements, remove the lock, and disconnect the wiring.
- We dismantle the front panel of the washing machine.
- We disconnect from the tank: the water intake valve, the drain pipe, the pressure switch, the wiring of the heating element, electric motor, thermostat, drain pump.
- We dismantle the counterweight and shock absorbers.
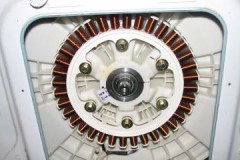
- We unscrew the fasteners, and then dismantle the motor.
- Remove the tank from the retaining springs.
After the tank is removed from the washing machine body, you can begin the main part of the repair work - replacing the drum.
The video will show you how to open the LG washing machine and remove the drum:
How to change?
Algorithm of actions:
- Unscrew the mounting bolts. We separate the tank into two parts.
- Applying a metal pin to the shaft, carefully knock the drum out of its seat with a hammer and remove it from the plastic body of the tank.
- We install a new drum, fasten the two parts of the washing machine tank (pre-coat the joint with sealant).
- We mount the assembled tank in its original place.
- We put the drive belt on the pulley, connect the wiring of the heating element and the electric motor.
- We connect the drain hoses.
- We return the UBL to its original place and fix the rubber cuff of the hatch with a clamp.
- We install a counterweight.
- We mount the front panel, control panel, bottom bar.
- Screw in the drain filter.
- We return the powder receptacle to its original place.
- We mount the top panel.
As soon as the last screw is tightened, you can start the test wash.
Cleaning
Soap scum, lint and hair remaining on perforated walls after washing, mold and mildew that actively multiply in a humid environment are not only a source of unpleasant odors, but can also cause serious damage to household appliances.
Modern models of washing machines are equipped with a “drum cleaning” mode. Launching the program is simple:
- press the “Start” button and wait for the sound signal;
- We find two buttons with the “*” icon on the control panel and press them for a few seconds (at this moment the washing machine stops responding to any other commands);
- Press the “Start” button again (the self-cleaning program starts).
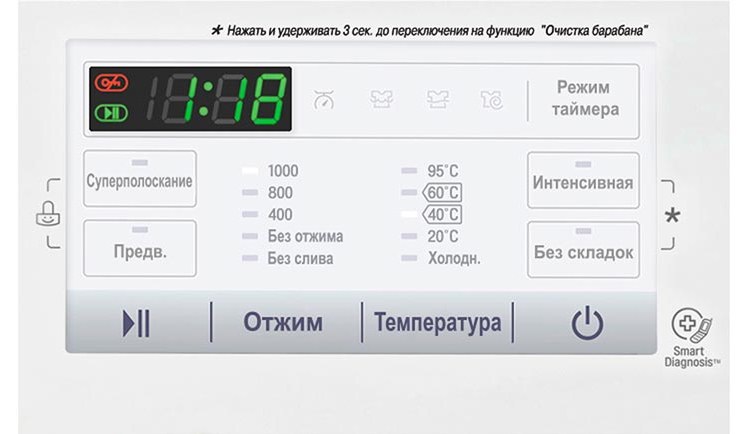
Cleaning lasts 90 minutes. A sound signal will indicate the end of the program.
Drum cleaning mode run with an empty tank, without using any detergents. As soon as the self-cleaning process is completed, the hatch door is opened to allow the inner surface to dry thoroughly.
Where and at what price can I buy a new one?
In order not to make a mistake in choosing a new drum, before purchasing you need to find out the exact serial number and model name, and year of manufacture of the washing machine. As a rule, complete information is indicated on the label, which can be found on the back of the household appliance.
The cost of a drum for an LG washing machine varies from 2000 rubles. up to 4000 rub.
Call the master
Service center professionals can replace the drum of an LG washing machine quickly, efficiently and, importantly, with a guarantee. Contacts are not difficult to find through Internet search engines. or use recommendations from friends.
Master services start from 1000 rubles.The cost of work includes: diagnostics, dismantling of the washing machine, installation of a new drum. During the repair process, hidden defects and malfunctions may be discovered, the elimination of which increases the final amount to be paid. Also, the amount of repair cost may be affected by the urgency of the order. New parts are paid separately.
The technician never announces the final amount without diagnosing the problem. washing machine. Insistent demands for immediate payment should raise red flags and give reason to doubt the integrity and true qualifications of the person who calls himself a master.
Conclusion
Replacing the drum of an LG washing machine is a rather lengthy and labor-intensive process. Carrying out repairs with your own hands, you can achieve the desired result only if you are careful and strictly follow the prescribed algorithm of actions.
