Practical recommendations for replacing bearings in an Atlant washing machine
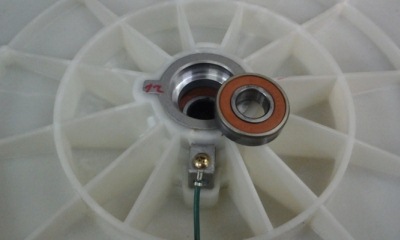 The bearing in the Atlant washing machine is one of the main components. This miniature element ensures rotation of the drum around its axis.
Acting as a connecting link between the pulley and the drum, the bearing experiences enormous loads and therefore wears out over time.
Our article will help you recognize the first signs indicating problems with bearings in your Atlant washing machine, as well as replace them yourself or find a repairman.
Content
Symptoms of a problem
Bearing wear in an Atlant washing machine begins with damage to the oil seal, so it will not be possible to do without replacing it. Its deformation leads to the fact that the metal ring begins to come into contact with water, rusts, and the friction force increases. As a result, the part quickly loses the ability to perform its functions normally.
Signs indicating wear bearing:
 During operation, the device makes strange sounds: rumbles, creaks, knocks.
- The vibration increases and the machine constantly moves from its place.
- When pressing on the top and bottom of the drum, play is felt.
- Drum jamming. This is the terminal stage of bearing failure. When you turn on the device, the machine refuses to wash and leaks.
The average bearing life is 5-6 years. This process is accelerated by regular drum overloads, manufacturing defects, and untimely replacement of parts.
Although the Atlant washing machine is equipped with a self-diagnosis function, there is no error code for bearing failure. Signs of their wear appear quite clearly, so it’s impossible not to notice them.
How to change on a washing machine with direct and belt drive?
There is no significant difference between replacing bearings in a direct drive machine and a belt drive machine. The main difference is the absence of a belt and the direct connection of the drum to the motor. Therefore, in devices with a commutator motor, the belt will have to be removed during disassembly, and with direct drive, the motor itself will have to be removed.
Preparation
Preparing the Atlant washing machine for the upcoming bearing replacement involves the following actions:
- turn off the water supply tap, if installed;
- disconnect the machine from the power supply;
- remove the laundry from the drum, drain the remaining water;
- remove the drain hose from the sewer;
- move the device away from the wall, furniture and other interior items that will interfere with the disassembly process.
 Tools and materials that will be required for repairs:
- screwdrivers of different shapes;
- pliers;
- hammer and chisel;
- awl;
- a metal rod or other adapter for knocking out bearings.
To facilitate the work and improve its quality, use VD-40 lubricant and sealant. If there is not enough experience in repairing washing machines, the entire process should be filmed or photographed the details of connecting parts. This will help you avoid getting confused during the process of reassembling the device.
If possible, it is better to carry out repairs not in the apartment, but in the garage or in the courtyard of the house, where there is a lot of free space and there is no risk of damaging the flooring. When dismantling a washing machine in an apartment, the floor is covered with cardboard and unnecessary rags.
Disassembly
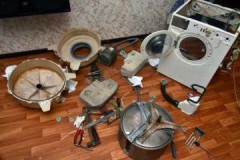
When all preparatory activities are completed, you can begin disassembling the Atlant washing machine. Algorithm of actions:
- Remove the top cover. It is held in place by 2 bolts, which can be found on the back wall. After twisting them, the panel is moved to the side and lifted up.
- Remove the control panel. First you need to remove the powder receptacle. It is pulled out by pressing the plastic latch located in the central part. In the seat for the tray you can find bolts that need to be unscrewed. They are the ones that hold the front panel. All that remains is to remove the terminals with the wires and slide it off the plastic latches.
- Remove the back wall. It is held in place by 6 bolts that need to be unscrewed. Behind it are hidden such parts as: a motor, a belt, a water intake valve, a pressure switch, pipes and counterweights. Some of the listed parts will be visible after twisting the cover, but it is more convenient to dismantle them after removing the back wall. All of the above components are fixed with bolts that will have to be unscrewed.
- Remove the front panel. First, twist the hatch door, remove the cuff and UBL. Then you can begin to remove the pump, which is located at the bottom of the device.
- Tighten the heating element, shock absorbers and drain pipe. For convenience, you can turn the machine on its side.
- Remove the tank by removing it from the shock absorbers.
- Unscrew the two parts of the tank that are connected to each other with bolts.
- Remove the pulley. To do this, use a hex key.
How to remove the part?
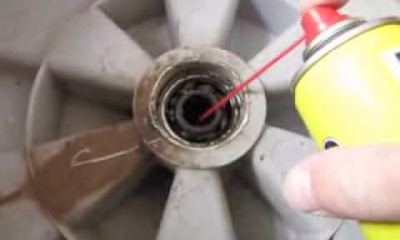 When the drum is in direct access, you can begin dismantling the bearings. The procedure is as follows:
- Using a flat screwdriver, remove the oil seal from the socket;
- fill the bearing with VD-40 - the lubricant will facilitate the process of removing it;
- fix the drum so that it does not wobble, knock out the bearing - first remove the larger element, strikes with a hammer on the chisel should be aimed and strong, when the outer ring can be removed, begin to remove the smaller bearing.
Experts recommend hitting the hammer crosswise along the contour of the bearing. You cannot hit the same place, so as not to deform it.
How to replace it yourself?
After dismantling the faulty bearing assembly, the seat is cleaned of any accumulation of rust, dirt and scale. Installation procedure for new bearing:
- Treat the socket with lubricant.
- Insert the bearing into the seat so that it fits smoothly, without distortions.
- The part is driven in with a hammer blow. It will not be possible to install it the first time, so the tapping continues until the bearing fits into the socket. You can understand that it has entered the clip by the sound of the hammer blows: it will become louder and sharper.
- Install a new oil seal.
All parts are wiped with a soft, dry cloth so that no moisture or dust remains on them.
All the details of replacing bearings are in the video:
We collect and check
Assembling the Atlant machine is easier than disassembling it. The entire procedure described above is necessary do it in reverse order, but taking into account some features:
- When screwing the two halves of the tank, you need to pay attention to their correct docking. The gap must be coated with silicone-based sealant. Before installing the tank in the machine, the silicone must be given time to harden.
- If leaky pipes and wires with damaged insulation are detected, they are replaced.
- Before installing the heating element, it is descaled, which increases the efficiency of the heater.
When the device is assembled, they begin to check its functionality. The machine is connected to communications, powder is added and the “Cotton” washing mode is turned on at a temperature of 60 degrees. The laundry is not loaded into the drum.
During test operation of the device, you need to monitor the correct performance of all functions. If the machine operates quietly, does not vibrate and does not leak, you can operate it to its full potential.
Where to buy, how much does it cost?
 Different models of Atlant washing machines have original bearings installed. To select the appropriate part, you need to know the serial number of the device. Not only the bearing must be replaced, but also the seal.
You can purchase a repair kit in online markets and in specialized stores. Its average price is 1000 rubles.
To buy a bearing that will be 100% compatible with your washing machine, you need to find the serial number on it. The new part must have similar values stamped on it.
Possible difficulties
Difficulties that may be encountered during repairs Atlant washing machine bearings:
- screws and screws for fixing different parts differ in length and size - to avoid confusion, they are folded onto separate sheets and labeled;
- if the bolts are rusty, you should not try to twist them by force - first they are treated with VD-40 lubricant, after 5 minutes the attempt is repeated;
- the new bearing does not fit in size - a similar situation arises if a part was purchased that is intended for a machine of a different brand; if the integrity of the part and packaging is not compromised and the receipts are preserved, you can try to replace the bearing.
Call the master
If you are not sure that you will be able to cope with bearing repairs yourself, it is better to entrust this work to specialists. You can find a master by looking at advertisements posted on bulletin boards on the Internet and in newspapers. In addition to private repairmen, service centers offer their services.
The cost of work differs depending on the city and the organization providing the service.. To replace bearings at a service center you will have to pay about 3,200 rubles. The price does not include the price of the part. It is paid separately.
The master must provide receipts and a report with a list of work performed. If the machine is under warranty, then malfunctions that are not the fault of the user must be corrected by the manufacturer.
Conclusion
Replacing bearings in an Atlant washing machine yourself is not as difficult as it might seem. The work will require patience, effort and time, but you will definitely be pleased with the result.

