Detailed instructions on how to sew a fabric storage box with your own hands
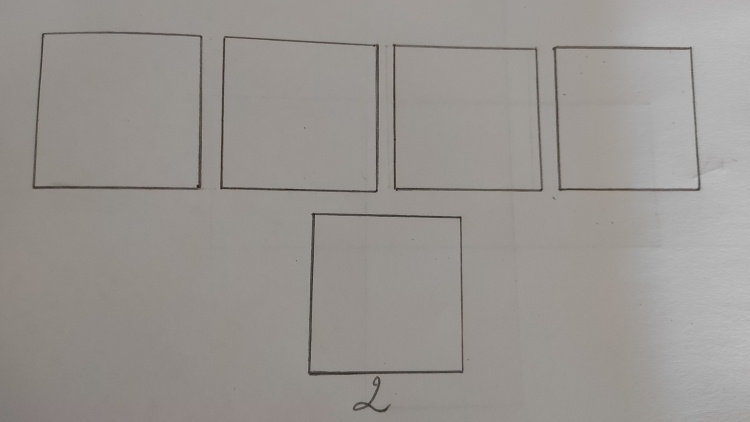
 Fabric boxes are great for storing items such as clothes, linens, towels, toys and other various household supplies.
Using simple materials, you can create a textile container yourself.
A handmade product can add originality to the interior and last a long time, taking its rightful place on the shelf.
We’ll tell you in this article how to sew a fabric box for storing things with your own hands.
Content
What do you need for sewing?
It is better to use dense fabric for sewing boxes that can hold its shape well. At the same time, it should not be too heavy so as not to “collapse” under the weight of its weight. Thick cotton or raincoat fabric is ideal.
To make a box you will need:
- 2 types of material: one for the external finishing of the product, the second for the internal;
- cushioning material with a high-density adhesive base;
- chalk or marker;
- scissors;
- safety pins;
- threads, needle;
- Equipment: sewing machine, iron;
- optional elements for decoration.
Sewing process
You can cut out parts in two ways:
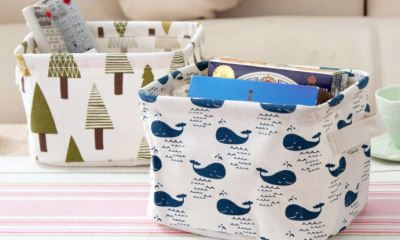
- In the first option, the box is made with the least number of seams, but the material consumption is high.In this case, it is necessary to cut out two cross-shaped parts from the main and lining fabric, one from the adhesive sealing fabric. The length of the sides of the “cross” is the size of the height of the product with the addition of 1 cm for allowances.
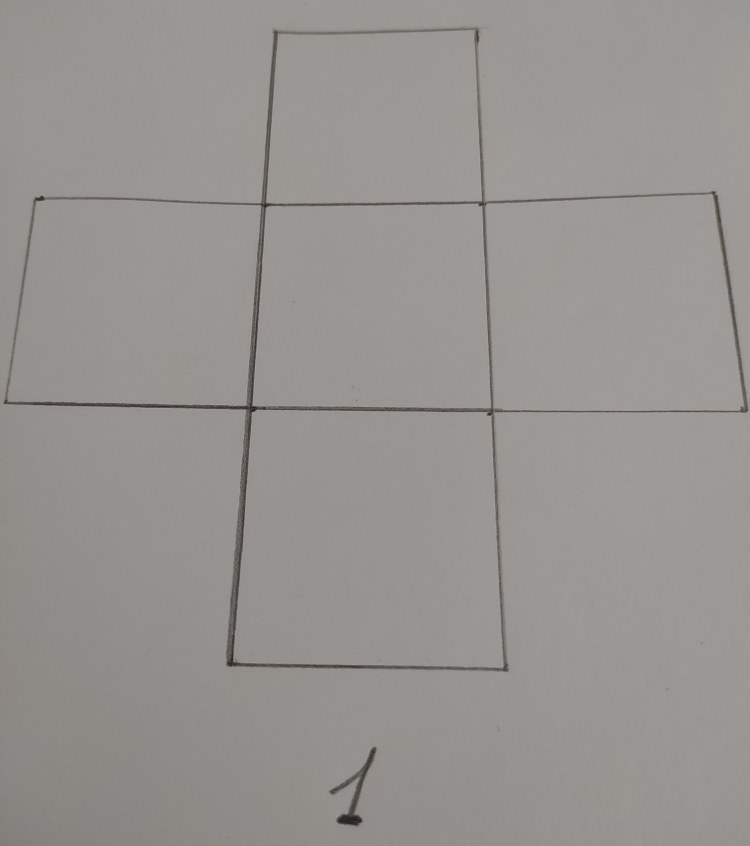
- The second method is recommended as the most economical. Fabric consumption is reduced, while providing additional rigidity to the ribs of the box. With this option, you need to cut out five squares from the base, lining and adhesive materials. Each side of the part is equal to the height of the box plus 2 cm.
In addition, you need to cut a strip to finish the top of the container: width = 4.5 cm; length = height of the box? 4 + 2 cm. To make handles, you need to cut out two strips from the main fabric: length = 15 cm; width=4 cm.
Progress of work (cutting was done using the second method):
- Preparation of handles. Stitch the parts so that their right sides are on the inside. Then turn it inside out and iron it.
- Interior. Using an iron, connect the parts made of adhesive material with the elements made of lining fabric. Sew wall squares to the bottom part on four sides. Cut off the corners of the seam allowances and iron them inwards. Sew a finishing stitch around the perimeter of the bottom. Connect the side walls.
- Grinding handles. Using pins, pin the prepared parts to the opposite outer walls of the square. At the same time, bend the open edges of the handles and leave them protruding slightly forward. Customize the elements.
- External part. Sew the seams in the same way as connecting the lining parts. Then insert the inner one into the outer finished box and fasten them along the top with pins.
- Preparation of facing. Along the entire length of the part, make a 1 cm inward fold and iron it. Leave one edge of the facing open.Fold the second one 1 cm and fix it with an iron. The folded edge will subsequently cover the opposite one.
- Stitching the facing. Pin the piece to the top of the box with the non-iron side along the entire top edge. Then stitch at a distance of about 8 mm from the edge. Raise the facing up and iron it. Then fold the part inside out and baste. Make a stitch, retreating 5 mm from the place of initial stitching, while grabbing the folded edge of the part from the wrong side of the container. The box is ready.
The video will show you how to sew a fabric box:
What is better - buy or make it yourself?
Soft textile boxes can be purchased ready-made. They are sold in stores that sell household goods.
You can also order fabric containers on marketplaces:
- Ozone;
- Wildberries;
- Yandex. Market;
- Aliexpress;
- SberMegaMarket, etc.
The cost of the product, depending on the size, material and workmanship, varies between 250-1300 rubles.
Despite the fact that storage boxes are commercially available and are immediately usable, There are a number of advantages to making them yourself:
-
 To create a product, you don’t have to choose expensive materials; you can get by with simple but effective ones.
The costs of making a box can be minimal or reduced to zero, since sometimes materials that have been “stay” at home for a long time are used.
- It is possible to choose the size, shape, and color that you need.
- Exclusivity.
Useful tips
Helpful Tips:
- When sewing a box, you can sew a small pocket with a window on its front side. A card is inserted into it with an inscription about what things are stored in this box. This part is made of felt, artificial or natural leather or other material that does not fall apart.
- The final result when sewing a box is influenced by what fabric was used and how the product was decorated. It is important that its style is in harmony with the interior. There is such a universal solution as making boxes from burlap. This rough fabric goes well with delicate lace and decorative flowers.
- When making a box, you can use not only cuts of material, but also unnecessary things. Old sweaters do the job. The knitted fabric looks great on the box and has an attractive texture. You just need to choose the right size item.
Conclusion
Storage boxes have many advantages and benefits. Especially if they are made independently and fit perfectly into the interior.
Placed on a shelf, they become an essential element of everyday life.. Some of them can only be purchased in a store, while others are easy to make with your own hands.


