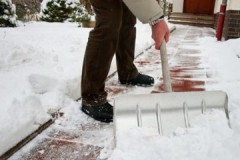
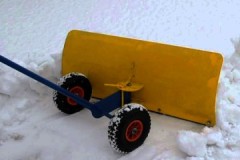
Two detailed master classes on how to make a snow shovel with your own hands
 In the winter season, one of the necessary tools for residents of a private home is a snow shovel.
Such necessary and useful equipment can not only be purchased ready-made, but also made independently.
Read on to learn how to make a snow shovel with your own hands.
Content
Requirements for snow removal tools
To work equipment, purchased or made on your own, there are special requirements:
- performing functional tasks (in this case, high-quality snow removal);
- presence of a comfortable handle;
- the height of the instrument corresponds to the height of the person;
- the size of the tray should allow you to clean snow, capturing its optimal amount;
- the bucket should have some inclination relative to the shaft for ease of operation;
- the structure must withstand the specified load (snow weight).
How to make?
The tools required for the job are determined taking into account the model chosen for manufacturing, availability of materials and accessibility. There are quite a lot of master classes on making snow removal equipment on your own. The most popular options are a shovel made of wood or metal.
Wooden
The simplest and most affordable material, which is relatively easy to process, is plywood and wood. It is from them that you can get a traditional snow shovel.
To work you need to prepare the following material:
- wooden handle (already finished);
- plywood sheet measuring 0.5 x 0.5 m and about 0.5 cm thick;
- aluminum strips.
Required tools:
 jigsaw;
- medium-sized sandpaper for sanding;
- drill;
- screwdriver;
- construction meter;
- self-tapping screws;
- board measuring 50 x 10 x 2 cm;
- means for opening the finished product;
- nails.
Procedure:
- Prepare the base of the future shovel bucket by cutting a 0.5 x 0.5 m square from a sheet of plywood.
- The board that will serve to connect the shaft and the scoop part should be cut into a crescent shape from the existing blank so that the width remains 10 cm in the central part, and narrows to 4 cm towards the edges.
- In the center of the board you need to make a hole the diameter of the existing shovel handle. You need to drill it at an angle.
- Place the shaft on the board with the hole. If there is excess length, cut it off.
- Clean the cut with sandpaper.
- Connect the plywood square to the board using small nails along the cut side. In this way, the bending of the bucket will be achieved.
- Insert the handle into the hole in the board and secure its position with self-tapping screws.
- The next stage is to reinforce the shear of the bucket with metal. For this purpose, you will need a strip 50 cm long and 10 cm wide. It must be put on the free edge, tapped and secured with small nails.
- The second strip of metal will be used to strengthen the joint between the bucket and the board.
- The third strip should strengthen the junction of the shaft and the working attachment.
- The final stage is priming. It will protect the tree from damage.
- Advice! If you don’t have a primer on hand, but have paint, you can simply paint the wood.
An example of production can be seen in the video:
Metal
You can make a snow removal tool from metal.And this is not always as difficult as it might seem at first glance.
Materials and tools for work:
- metal strip 0.4 cm thick - 4 meters;
- ready-made wooden stalk;
- drill;
- Bulgarian;
- oven tray (or other metal sheet);
- means for opening the shaft;
- tool for installing rivets.
Procedure:
- The base of the shovel bucket is cut out of the baking sheet. A grinder is used for this work. Approximate dimensions – 0.5 x 0.5 m.
- The metal tape is cut into strips 0.5 m long. You will need 6 such strips.
- Make holes in the tape in 5 cm increments.
- Apply and secure strips on the base of the bucket, 3 vertically and 3 horizontally, to form a mesh. Fastening is done using rivets and special tools.
- Decide on the length of the cutting. The excess part is cut off.
- Sand the cutting.
- Attach the cutting to the working attachment using a pair of 15 cm metal strips.
- Treat the shaft with a primer (varnish, paint or other wood preservative).
An example of making a metal shovel is in the video:
Advantages and disadvantages of homemade equipment
DIY snow shovels have their strengths and weaknesses.
The advantages include the following:
- you can make equipment from improvised means that are already available;
- even when purchasing the necessary missing material, there will be significant financial savings;
- it is possible to choose a model that fully meets personal requirements in all respects (height, size and shape of the bucket, etc.).
The disadvantages include the following factors:
- making a shovel takes time and effort;
- You may need to purchase additional tools and consumables;
- It is advisable to first make a project and make a drawing indicating dimensions, types of fastenings, etc.;
- the result of the work may not be satisfactory, especially if there is a lack of experience.
Recommendations
When making a snow shovel The following expert recommendations will help:
 Work should begin after completing the preparatory activities - completing the drawing, selecting tools and materials.
- In pursuit of strength, you should not allow the snow scoop to be overly heavy. Otherwise, using it will be inconvenient and physically difficult.
- If there is no ready-made wooden handle for making a shovel, you can use a long beam with a square section of 5 x 5 cm and grind it with a plane.
- A drawing of the future product must be made in advance.
Conclusion
A do-it-yourself snow shovel is an economical way to solve the issue of equipment for a country house. If everything is done clearly according to the instructions, carefully and carefully, you can get a practical, functional tool that will serve for years.


