Step-by-step steps on how to disassemble a Whirlpool washing machine with your own hands
 It is not difficult to disassemble a Whirlpool washing machine if you know how the device works. All elements of household appliances are enclosed in a metal casing, so dismantling must begin with it.
Before you begin, you need to prepare for this process and study the layout of the basic components.
To learn how to disassemble a Whirlpool washing machine with your own hands, read the article.
Content
Preparing to disassemble the Whirpool washing machine
Preparing to disassemble a Whirlpool washing machine is a mandatory step. You should not ignore it, so as not to be distracted by searching for the necessary tools while doing the work.
For dismantling you will need:
- pliers;
- screwdrivers of different shapes or a screwdriver;
- wrench;
- hammer (needed when replacing bearings);
- empty bucket and rag;
- VD-40 lubricant or its equivalent.
When the tools are collected, it is necessary to decide on the location of the work.
Before starting transportation, equipment must be disconnected from all communications. In order not to spoil the floor covering, it must be covered with cardboard or thick material. You should also keep a bucket and a rag at hand in order to collect the remaining water from the pipes in time.
SMA device diagram
Basic elements of all Whirlpool machines:
 Motor. If it is a commutator, then it includes a drive belt. The inverter motor is directly connected to the drum.
- Tank. It consists of two halves with a drum inside. Its package includes a crosspiece, a bushing, a shaft, and bearings. There are bumpers (stiffening ribs) inside.
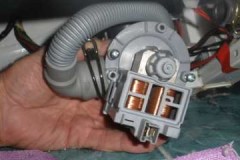
- Water drain pump. Its design consists of a motor, impeller and pipes. Before entering the pump, the water passes through a mesh filter.
- Shock absorbers. These are two springs that hold the tank.
- Control board. This is the main element that is responsible for all the actions performed by the washing machine.
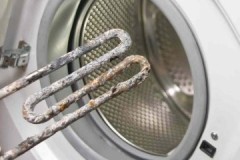
- heating element. This element heats the water. It is located under the tank.
- Tachometer. It controls the rotation speed of the drum.
- Pressostat. A small sensor is located under the top cover. It performs the function of determining the water level in the tank.
- Counterweights. They hold the device in place during vibration.
In addition to the listed elements, the design of the washing machine includes:
- drain hose,
- inlet hose,
- input filter,
- power cable.
A diagram of the washing machine is needed in order to understand exactly where each element is located. In general, the differences between different models of Whirlpool SMAs are minimal. The only difference is the orientation of the drum.
Instructions
The disassembly diagram for the Whirlpool washing machine will differ depending on the type of load. First of all, this concerns the sequence of actions.
Front loading appliance
Adhering to the following algorithm, you will be able to disassemble any model of washing machine Whirlpool Side Loading:
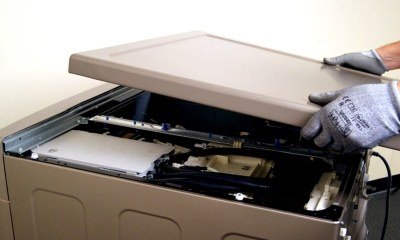 Unscrew the top cover. It is secured with two bolts, which are easy to reach. After removing them, the lid is lifted up slightly and pushed forward.
- Unscrew the screws holding the control panel and remove it. Behind it is an electronic module, which is fixed with small bolts and latches that need to be opened.
- Immediately under the top cover you can see the water level sensor. It is held on by one bolt, which is unscrewed.
- The next step is to remove the detergent tray. To get it out, you need to pull the plastic tab. There are no other fixing devices.
- To remove the front wall, you need to tighten the top mounting screw. If necessary, remove the hatch cover. Release the clamp and remove the cuff. You can then remove the front wall completely and move it to the side.
- Behind the front wall there are traverses that need to be twisted.
- Disconnect the contacts leading to the surge protector and remove it.
- Remove the water supply valve. It can be seen on the back panel at the top.
- Twist the counterweights.
- Remove the belt and motor.
- Remove the heating element, which is fixed with one bolt. You need to take it out carefully, swinging it from side to side.
- Disconnect the thermostat.
- Remove the tank. If necessary, untwist it into two halves.
- There is a drum inside the tank.If access to its internal components is required, first remove the spider, then the pulley, oil seal and bearings.
- Dismantle the pump. It is disconnected from the filter, drain hose and pipes.
The washing machine is completely disassembled. You can begin repairing or replacing spare parts.
The video will show you how to disassemble the Whirlpool washing machine:
From vertical
To disassemble a Whirlpool top-loading washing machine, perform the following actions:
- Unscrew the fasteners that are located on the right and left walls of the case. They act as external latches for the top cover.
- Carefully pry up the control panel and disconnect the contacts from it.
- Under the panel you can find several more bolts that are also twisted. Another screw is located behind the seal; once this is removed, the top cover can be removed.
- Loosen the clamps and remove the pipes.
- Screw in the bolts holding the side walls and front panel.
- Remove the belt from the motor.
- Dismantle the engine.
- Remove the pump.
- Twist the heating element.
All that remains is to remove the drum and counterweights, remove small elements (pressure switch, thermostat, filling filter) and hoses.
How to put it back?
 After completing the planned work, the machine needs to be assembled. All actions are performed in reverse order, starting with the largest element - the tank.
When it is in place, install the pump, motor, heating element. The sensors are screwed on top, pipes are inserted, and counterweights are fixed.
When all the components are in place, the body is assembled. Before screwing on the top cover, you need to once again check the reliability of the fittings and the tightness of the contacts.
If the detergent dispenser and pipes are coated with limescale on the inside, the stone must be removed before reinstalling. A solution based on citric acid copes well with this task. Soaking time is about 30 minutes.
After connecting the device to communications, you need to check its functionality. To do this, the wash is started without items. You can choose a short program, the main thing is that all functions are used: heating the water and spinning.
Difficulties and ways to overcome them
Difficulties you may encounter when disassembling the Whirlpool washing machine:
- in order not to confuse the bolts that secure different elements, they need to be laid out on sheets of paper and the corresponding signatures made; matchboxes are also suitable for this purpose;
- when connecting the control board, there is a risk of mixing up the terminals, which can cause damage to household appliances - to prevent this from happening, the wire layout must be recorded on your phone;
- some bolts may come out of the thread with difficulty; if they are rusty, they need to be treated with lubricant;
- if after assembly any of the elements do not work, it is necessary to check the tightness of the contacts;
- To avoid stripping the threads, do not apply excessive force; the bolts must be secured securely, but without force.
Conclusion
Assembling and disassembling the Whirlpool washing machine is not difficult if you follow the correct sequence of actions and prepare for work in advance.
If possible, an assistant is involved in the dismantling process., since some elements are easier to remove with two people due to their impressive weight and size.
