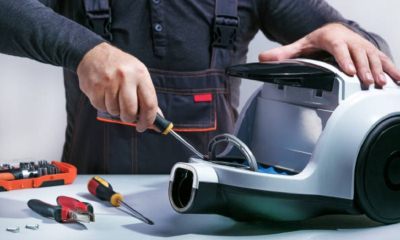
Step-by-step instructions on how to disassemble a Samsung vacuum cleaner yourself
 There is no technology that does not break. Even the best-quality devices sooner or later fail and require repair.
Samsung vacuum cleaners are no exception. To replace defective parts, the device will have to be disassembled.
For information on how to do this - disassemble a Samsung vacuum cleaner yourself - read the article.
Content
Preparing for disassembly
Before you start disassembling the vacuum cleaner, you need to do some preparatory work. They include:
- Disconnecting the device from the power supply.
- Twisting the cord.
- Removing and cleaning the dust container.
- Preparation of the workplace.
- Removing the hose with tube and nozzle, filters, detachable covers.
It will not be possible to disassemble the vacuum cleaner without tools. To complete the work you will need:
- pliers;
- screwdrivers;
- vice;
- file and awl;
- hammer;
- drill.
Device diagram
Device diagram The Samsung vacuum cleaner is represented by the following components:
 A pipe and hose through which collected debris enters the dust collector.
- Brushes and nozzles. Depending on the model, their set and design features will differ.
- A housing on which various sensors and buttons are located. Most often, it contains a power regulator and a dust bin full indicator.
- Power cord and hole for it. Even the most budget Samsung vacuum cleaners are equipped with an automatic winding function.
- A dust collector, which can be represented by a bag or container.
- Filter or filter system.
- Motor. Inside the motor there are blades, bearings, seals, impeller, shaft, rotor, impeller. Its components include brushes.
- Control board.
- Wheels.
We disassemble a Samsung household appliance
To disassemble a Samsung vacuum cleaner without damaging it, perform the following algorithm of actions:
- Unscrew the bolts securing the device body (most often there are four of them). If the lid does not open after removing them, you need to look for hidden screws that may be located next to the buttons. On some models, the case is additionally secured with latches; they need to be opened.
- Separate the two halves of the housing. This must be done manually without using excessive force. The plastic cover is pushed to the side. When all the latches come out of the grooves, the case opens easily.
- Under the cover you can find the control board. Depending on the model of the device, it is located on the left or right. Normally, the module is securely fastened to the housing. It is dismantled by unscrewing the screws and disconnecting the terminals leading to it.
- Remove the motor. Sometimes it is inside a plastic box that will have to be disassembled first.
- Unscrew the terminals from the motor and remove the brushes.
- If you need to get to the impeller, remove the metal cap that covers it. It can be carefully knocked down with a hammer.
- The disk with the blades is firmly tightened with a nut, which is unscrewed with a socket wrench. For convenience, the anchor is fixed with a vice. After twisting the nut, the impeller can be easily removed.
- If you need to get to the bearings, then remove the shaft.The bearings themselves are knocked out using a bolt and a hammer.
It is not always necessary to completely disassemble the motor of a Samsung vacuum cleaner; sometimes it is possible to get by by replacing or cleaning the parts located in the body.
The video will show you how to disassemble a Samsung vacuum cleaner:
How to assemble?
To reassemble the vacuum cleaner, you need to perform all the steps in reverse order. The main thing is not to lose or confuse the location of the parts. The hardest part is assembling the motor.
The algorithm of actions is as follows:
- a pressure gasket and a wavy metal ring are put on the shaft with bearings;
- cover the rotor with an impeller and petal, screw on the brushes;
- crimp the metal cover using pliers;
- install the engine back, connect the contacts.
All that remains is to screw the control board, connecting it to the terminals, insert the cleaned filter and assemble the housing.
Features of disassembling robot vacuum cleaners
Samsung robot vacuum cleaners are compact in size, but have a complex design. They have built-in software with which you can control this miniature assistant. Knowing the design of the robot vacuum cleaner, you will be able to disassemble it faster.
It is represented by the following components:
 a housing on which the container locking button is located, a sensor for contact with the limiter, a handle for transportation, a charging socket;
- wheels;
- brushes;
- contacts for connecting to the base;
- pollution sensor;
- rubber scraper;
- motor, dust collector, control board - all this is located inside the case.
Disassemble the robot vacuum cleaner in the off state. Remove the cover, remove the dust tray, tighten the screws securing the body, and remove the side brushes.
Under the cover there is:
- battery,
- laser rangefinder with wires,
- control board,
- engine.
Possible difficulties and ways to overcome them
When disassembling a Samsung vacuum cleaner, you may encounter a number of difficulties. Avoid additional time and financial expenses The following tips will help:
- The bolts and screws that secure the body and internal parts vary in length and size. To avoid confusion when assembling the device, they are placed on a sheet and signed.
- Even if the case is difficult to open, do not use a screwdriver. Its use may cause the plastic to chip.
- When you unscrew the nut that secures the disk with the blades in the motor, you will find that there is no thread on it. In this case, it is applied independently, using a hacksaw.
- In order for all parts to work properly, they must be installed in clean locations.
- When disassembling the vacuum cleaner, you need to evaluate the condition of the brushes located on the motor. If they are worn out, it is better to replace them immediately.
Conclusion
When disassembling a Samsung vacuum cleaner, you need to act carefully so as not to damage serviceable parts. If you are not confident in your abilities, it is better to entrust this work to professionals.


